Thursday 29 November 2018

Wednesday 28 November 2018

Wellness Week: Skin Deep


This was a visual novel/ game-like thingy that helps to raise awareness for skin cancer

Tuesday 27 November 2018

Wellness Week: Elude


Elude is a game about depression to help family or friends who don't understand what it's like to go through, understand it a little better

Wednesday 21 November 2018

Minecraft water discus hotel

Minecraft Water discus hotel

Slideshow 1 


Slideshow 2


Slideshow 3


Video


Monday 29 October 2018

Friday Post: Premiere Pro

Dynamic Systems Slideshow


How Did I Make It?

  1. I played the "Dynamic Systems" engineering game and took screenshots of each level (solved & unsolved) as well as the title screen
  2. I took the images and put them in premiere pro 
  3. I added a song and placed a few markers along the timeline for the intro
  4. I added the images for the intro into the slideshow using the "automate to sequence" function
  5. I blurred the entire intro and added a spinning title
  6. I added the 10 level images on layers 1 and 2 (layer 1 solved, layer 2 unsolved)  
  7. I made the images on layer 2 shrink, blur, and become transparent so that the images on layer 1 could be seen
  8. I made the images on layer 1 grow, and become focused after the first set of images had become completely transparent (these images were never transparent so that the screen was never fully black)
  9. I cut the song at the end in a spot that made the most sense and added a translucent image of Borzah Yankey 


Wednesday 24 October 2018

Premiere Pro: IT So Far Slideshow


How Did I Make It?


  1. I took 20 images and put them on the timeline with a speed/ duration of 00;00;00;10
  2. I used "effect controls" to change their scale and position using keyframes at the start and end off their screen time to make the images zoom in and out of the faces in each image
  3. I added a new text layer under "graphics" to write the title. I changed its colours using "stroke" & "fill." I also used " effect controls" again to change it's scale over the course of all ten images, so that it got larger and larger until it reached the end
  4. I added the 20 images in again but this time with a speed/ duration of 00;00;01;00
  5. I went to the "effects" tab and search "blur" in the search bar and added a Gaussian blur
  6. I increase the blur until the shapes were recognizable but you couldn't see what they are fully
  7. I changed the scale of the first image so that it got bigger over time. Then I copied and pasted the attributes of the first image to all of the others
    I added the 20 images again and changed their scale so that you can see the blurred images beneath them
  8. I changed the position, and scale of each image so that it would either slide in the from top, bottom, left, or right of screen and zoomed in from being very small
  9. I added transitions between the pictures from the "video transitions" folder so that the video had more flow
  10. I added the rectangle boxes and text together as 1 graphic. I then used position keyframes to have them slide on & off of the screen. In the case of Donald Drumpf I used an ellipsis and changed the opacity's keyframes to make it fade in  
  11. I the found the sound files for " Flex" and "See You Again" added them in
  12. I cut the sound files so that the beat lined up and the song would end, then the next would start. I then used keyframes to make the first fade out as then second stared and then to make the second fade out as the video ended
  13. I added a picture of Papa John and changed the "lumetri colour" to make the image red
  14. I changed the volume using keyframes and added a scream so that Papa John would be spookier


Thursday 18 October 2018

Premiere Pro: Kung Fu Panda Slideshow


The Slideshow


How Did I Make It?

  1. I took 10 images and put them on the timeline with a speed/ duration of 00;00;00;10
  2. I used "effect controls" to change their scale and position using keyframes at the start and end off their screen time to make the images zoom in and out of the faces in each image
  3. I added a new text layer under "graphics" to write the title. I changed its colours using "stroke" & "fill." I also used " effect controls" again to change it's scale over the course of all ten images, so that it got larger and larger until it reached the end
  4. I added the ten images in again but this time with a speed/ duration of 00;00;01;00
  5. I went to the "effects" tab and search "blur" in the search bar and added a Gaussian blur
  6. I increase the blur until the shapes were recognizable but you couldn't see what they are fully
  7. I changed the scale of the first image so that it got bigger over time. Then I copied and pasted the attributes of the first image to all of the others
    I added the ten images again and changed their scale so that you can see the blurred images beneath them
  8. I changed the position, and scale of each image so that it would either slide in the from top, bottom, left, or right of screen and zoomed in from being very small
  9. I the found the sound file for " Soulja Boi" and added it in
  10. I cut the sound file so that the beat lined up and the song would end by the end of the slide show
  11. I changed the volume and bass using keyframes so that the last "YOU!" in the song was ridiculously loud

Friday 12 October 2018

Friday Post: Photoshop 2


I stare out of the mirror & the muffin stares back


How was it done?

First I took the image of the mirror and copied the frame. This way I can put the eye-hand-man-thing into it without him being in front of the  mirror which is what I did second. Then I put in the solar flare background and multiply-blended it with the mirror. I then set the levels and hue/ saturation to give the mirror's frame a different colour. Next I put in the muffin and used the levels adjustment layer to give it a shadow. I then merged the layers (Alt + Ctrl + Shift + E) and converted them to a smart layer. I used the camera raw filter to sharpen the image and give a slight grainy texture over it. Then I used a gradient map at 13% opacity to slightly change the colour of the entire image.


Thursday 4 October 2018

Photoshop: Cracked Skin Tutorial


Photoshop: Cracked Skin

Tutorial


My Attempts

Dondald Drumpf


Father John


Dr. Steve Pharvil


You can do it on other things too I guess


The Washington Monument


Space

(Colours changed by using different gradients)


I Don't Even Know Anymore, A Clock?


Friday 28 September 2018

Friday Post: Thunkable

\

Web Viewer App


What Is Thunkable?

Thunkable is a website designed for making apps that you can either keep for yourself or publish on the app store or the google play store


What Have I Used It For?

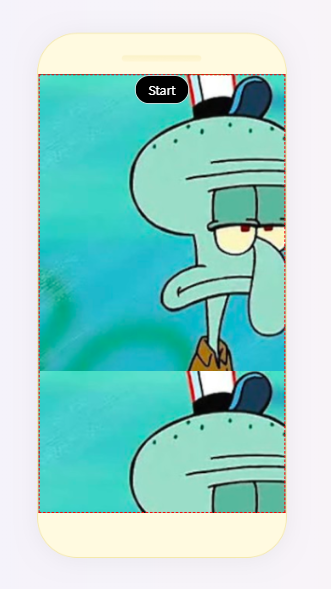
I've used Thunkabkle to make a few apps which can all be seen in the posts below this one


My Opinion

I think Thunkable is a simple way to create apps and share them with your friends. The best way to learn how to do this is with their tutorials on YouTube. The only problem is they have a ton of useless tutorials on their channel for earlier version of the software with a man who makes the entire experience painful while trying to be funny with his voice. You are able to get to the earlier software setup on their website, but you can live test it with your phone given that they've updated their app so that only modern phones are able to download it and have entirely removed the ability to live test with their old website setup. If they cleaned up their YouTube channel and just left the useful tutorials, or even updated some of the old ones to fit with the new software, it would be a good way to make apps.